
 **Introduction**
There’s a certain joy that comes with finding a hidden gem at your local thrift store. Whether it’s an iconic piece like a La-Z-Boy office chair or vintage decor, reimagining those second-hand treasures can add character to your home. However, along with the excitement of thrifting often comes the challenge of repairs. If you’ve recently acquired a piece that’s in need of some TLC, fear not! In this article, we’ll dive into practical steps for assessing your thrifted finds, sourcing necessary parts, and transforming them into functional and stylish additions to your space.
—
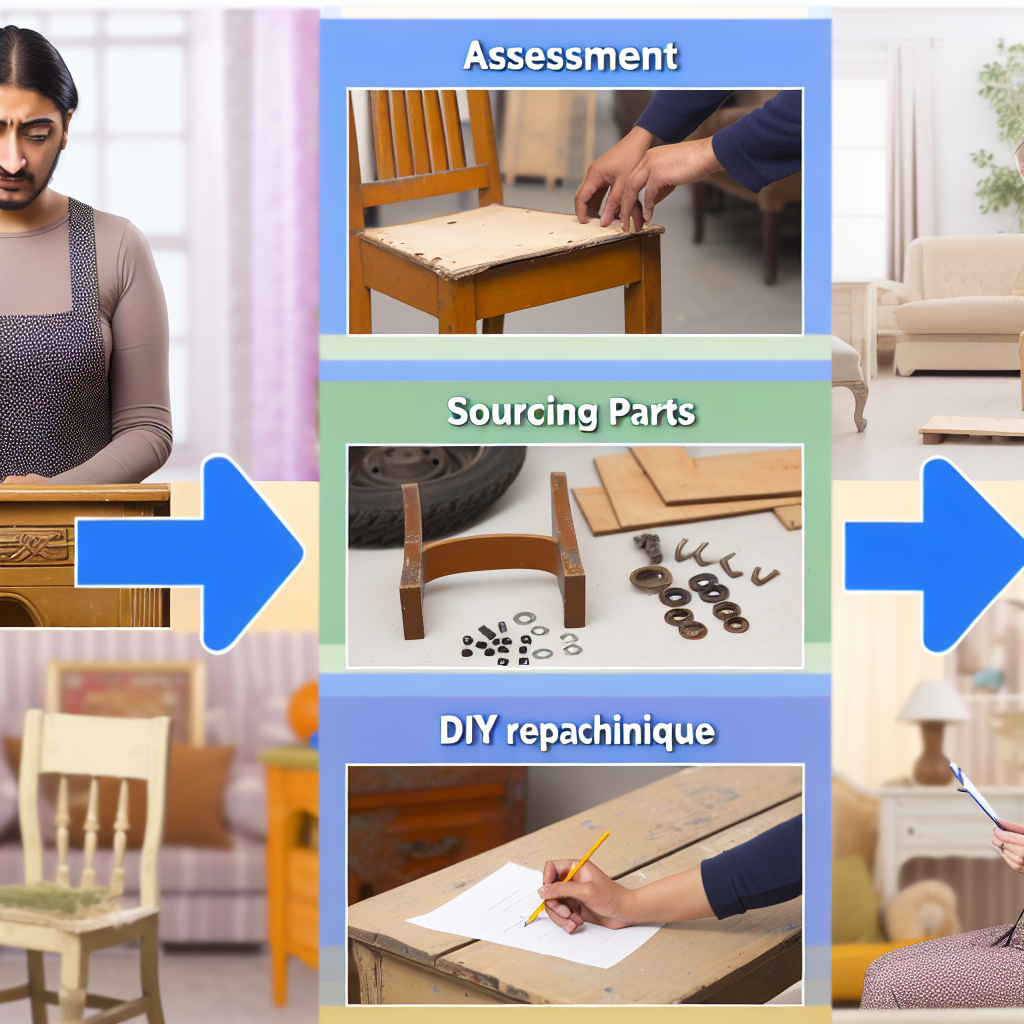
### Assessing Your Thrifted Treasure
Whether your thrift find is a sturdy office chair with some missing parts or an elegant table that simply needs a good polish, the first step is to assess its condition carefully. Here’s how to play detective:
1. **Inspect for Damage**: Look for any signs of wear and tear. Check the frame and upholstery closely. Are there any scratches, tears, or loose parts? Take notes—this will help you determine what repairs are necessary. Use a flashlight for smaller details and magnifying glass for inspecting the fabric quality.
2. **Test Functionality**: For furniture pieces with moving components (like an office chair), test out the mechanisms. Does the chair tilt smoothly? Do the wheels roll easily? Identifying operational issues early will streamline your repair process.
—
### Sourcing Replacement Parts
Now that you’ve identified what needs fixing, it’s time to source those elusive replacement parts. Here are some tips to help you find what you need:
1. **Check Online Marketplaces**: Websites like eBay, Amazon, or specialized furniture parts suppliers can connect you to the exact components you need. Simply search for the model of your chair or the specific part you’re missing. Be specific with your queries—using model numbers can aid your search significantly.
2. **Reach Out to the Manufacturer**: Contacting the brand directly can often yield surprising results. Many companies offer replacement parts for their products, even if they’re older models. This might require a bit of patience, but the manufacturers often appreciate inquiries from their customers.
3. **Visit Local Hardware Stores or Thrift Shops**: A nearby hardware store might have generic parts that can do the trick. Alternatively, lighting up your local thrift scene again can unveil other overlooked treasures that fit your needs! Don’t hesitate to ask staff if they can source parts not available in store.
—
### DIY Repair Guide
Once you have your replacement parts, it’s time to get your hands dirty! Here’s a step-by-step guide to tackle typical repair tasks for your thrifted office chair:
1. **Replacing Missing Parts**: If you’ve sourced new plastic caps for the frame or cushions for the seating area, start by removing the old parts carefully. Use a screwdriver or even a heat gun for stubborn parts that may be stuck. Attach the new parts according to their specific fitting instructions, ensuring a snug fit for longevity.
2. **Repairing Frayed Cords**: If the tilt mechanism’s cord is frayed, you might not need to replace the entire assembly. Carefully cut away the frayed section and re-attach the cord using an appropriate connector or knot. Ensure that the cord is securely fastened for safety and functionality. A misplaced knot might lead to future issues, so check the entire length after re-attachment.
3. **Upholstery Repairs**: If the fabric has rips or stains, consider reupholstering. Use a staple gun and your favorite fabric to give your chair a stylish upgrade. If you’re not comfortable with upholstery, simple patchwork could suffice for minor damages. For reupholstering, it’s recommended to remove the old fabric carefully, as it can serve as a pattern for your new piece.
—
### Tips for a Successful Upcycle
– **Keep It Simple**: Start with small projects if you’re new to DIY. Tackling a major revamp might be daunting, but simple repairs can boost your confidence and skills as you gradually progress to more complicated tasks.
– **Involve Your Family**: Get the household involved. It can turn your repair session into a fun family activity, creating lasting memories and shared satisfaction when finished.
– **Document Your Journey**: As you transform your thrifted find, snap pictures of the process. Sharing your adventure can inspire friends and followers—plus, it’s great to look back on your handiwork! Consider creating a scrapbook documenting your DIY journey.
—
### Takeaway: Embrace Your Thrifted Joys
Finding a thrifted piece with a character that speaks to you can be incredibly fulfilling. With a little effort, you can breathe new life into items that might seem unusable at first. Remember, the goal of DIY isn’t just functional repair—it’s about creating something unique that reflects your style. So gather your tools, source those parts, and get ready to be amazed at what you can accomplish. Your thrifted chair can become a cherished gift, making the effort entirely worthwhile. So roll up your sleeves and happy DIYing!
**Final Thought**: As you step into the world of DIY and furniture restoration, I invite you to reflect on your own projects. Do you have a thrifted treasure waiting for a transformation, or are there skills you want to develop further? What’s holding you back from diving into your next big project?
Leave a Reply